Tag Archives: gardening

Birch sap in a jar

Invigorating, confusing joyous learning

One of my favourite things in life is learning new things. It is when I feel my most alive, when I feel my eyes are widest and the world seems, more amazing somehow. I expect there is a percentage of folks out there to whom things come easily, gifted folks who are “naturals” at certain things. I am not one of them.

Learning is rarely straight forward and most times I find myself excited, confused and exhausted all at the same time. I also fail, a lot. I’m not bragging that I’ve gotten things wrong, I certainly never set out with a mindset of anything other than success, it’s just the way I learn best. Over the last four decades I’ve come to accept that this is how things go. I’ll happily tell you I am bound to make every mistake acquiring a new skill might entail, but so long as I am not repeating those mistakes and getting stuck, then in my mind at least, it’s a win.

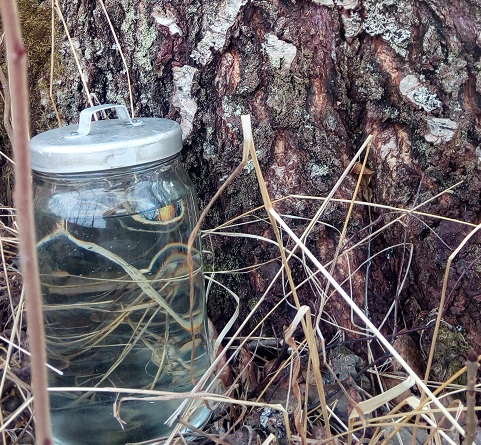
With that in mind, so far in 2017 there has been a lot of learning along side some marginal gains. Our first succession sowing of heirloom and heritage beans are off to an amazing start, the tomatoes are tentatively stretching up out of the seedling soils and the sap collection from our Birch is in the final quarter of what might be the shortest season on record! The same unusually high temperatures that are helping the seedlings yawn to life has also put the bushes and trees into overdrive and “bud burst” is just around the corner. I’m guessing we’ll start seeing leaves in 48 to 72hrs. I love this time of year, the rush of life and sense of urgency in the awakening of things. Conversely, it also means our new venture into Birch Syrup is at risk of being cut short this year which will probably mean more trials next year!


jerusalem artichoke flower

Five reasons to consider planting Jerusalem Artichokes

Spring is beginning to raise its beautiful green head above the parapet and with it our green fingers begin to itch to get in the soil. Winter time is a great time to plan your next gardening adventures and in case you have a wee bit more room in your beds, I’m going to sing  the praises of Jerusalem Artichokes.

They’re Beautiful. Even someone as dedicated to the mantra of “everything must first be edible and useful” will admit, it is difficult not to smile when the sunny yellow heads of this Sunflower relative are in bloom.

Protection and improvement of cropping. Standing at up to 2m tall Jeruselums make an excellent semipermeable wind break for your less wind tolerant crops. Planting these in a row on the winds prevailing side can shelter more delicate crops and help increase yield.

Crop well with little fuss. Every gardener needs a crop that is less fussy and provides abundance whilst being low maintenance. These guys are it.

Easy to harvest. Once the tops begin to turn golden and the bite is in the air all you need is a fork to lift the lovely tuber and brush off excess mud.

Grade A hotels. Once harvested the stems of the plant should be left in situ. Their hollow stems make great over wintering “hotels” for our beneficial insect friends. This gives your garden a head start in the spring as your good guys are in the correct geographical region to nip out any of the bad guys who have overwintered in your soil. After the risk of frost has passed, the insects will have moved out of the stems, the stems can then be added as an excellent carbonaceous element to your compost pile, completing the circle.

An excellent alternative starch. Jerusalem Artichokes are very versatile in the kitchen and their lightly nutty taste is quite a winner. They can be grated raw as part of salad, sliced and lightly steamed to add crunchy to a stir fry, pureed or scrubbed and roasted with rosemary and sea salt as an attractive side. Some people do experience wind with eating them, so it is best to eat small amounts at any one time.


lifting rhubarb

Readying rhubarb for the coming spring

Here in the United Kingdom Rhubarb enjoys a rather prestigious place in the culinary calendar. The pale pink slender stems of “Champagne Rhubarb” are both the ushers of spring and the first reliable cash crop of the year. No matter how much is grown at Organic Lea, the demand far outstrips the supply our mere 2 acres of diverse intensive farming can produce.

Champagne Rhubarb production is lucrative, but it can also be relatively expensive as the crop is grown in heated forcing sheds. Currently, nine square miles of West Yorkshire, is known as “The Rhubarb Triangle” and encompasses twelve farms. In 2010 these farmers approached the European Commission’s Protected Food Name scheme and were awarded Protected Designation of Origin status (PDO) for the term, “Yorkshire forced rhubarb.” Forcing Rhubarb is big business for some, however it can be done with some success in a low tech way small scale using your netting wires and a blackout cloth.

For many growers,  Rhubarb is planted once. It’s widely accepted that some vegetables like Rhubarb, Asparagus and Jerusalem Artichoke, stay put when planted and remain indefinitely. Many successful allotments and growers subscribe to this thinking and harvest successfully year on year. Organic Lea is committed to using two of it’s acres to intensive organic farming and rotation is a key element in keeping both plants and soil healthy. This means that even crops that traditionally stay “forever” in one place are included in rotation, albeit for these crops they move once every four years.

This is year four for our early Rhubarb crop and the first year of it’s rotation, so this week we uprooted one of the four rows of Timperley Early and began the process of splitting and moving it to the area of the farm called The West Bank, or Salad Terrace. Over the years, the team have noticed that the Salad Terrace is the coldest plot on the farm. It is also the most over run with Horsetail. The thinking is, that Timperly Early will not suffer from the slightly colder micro climate and that with it’s maturity it’s wide leaves may also slow the rampant encroachment of one of the world’s oldest known “weeds.” Both of these factors have inhibited the Asparagus from reaching it’s full potential so we are effectively preforming an experimental swap of the two.

Splitting the Rhubarb serves two purposes, the first and most obvious is propagation. Mature crowns are quite easily split to produce multiple plants. To do this effectively one only need ensure each split contains both root and bud, we leave two to three buds in a spit.

The second reason for splitting is to cut away the heart. This may seem counter-intuitive, however the older a plant is, the more susceptible it becomes to disease. By lifting and splitting the crowns and cutting out the old growth we are taking preventative measures against potential disease in the crop. The oldest part, or heart then is added to our compost completing its circle.

DSC_1096 (2)

Growing Diversity: saving Jerusalem Artichoke seed

Before the ground freezes, and after the stocks have turned crunchy and golden is the time lift and store our Jerusalem Artichoke tubers. These starchy little wonders will liven up your meals through the dark days of January and February as well as add an element of beauty during the growing season, but you already know that if your now reading about how to save the tubers for next season!

Similar to what we look for when harvesting Garlic for seed, you are again looking to save and replant prime specimens. Those that we plant should be those with the positive traits we want to encourage in order to improve our seed stock and harvest year on year.

With Jerusalem Artichoke, this means setting aside those golfball size tubers, that are knob and blemish free. The should not show any sign of blight, insect damage or disease. One you’ve set aside your seed stock you’ll need to store it before it’s time to go in the ground again. Always try and store a small percentage more than you think you are likely to need as with planting there will always be the chance of failure in a few.

For the best chance of a successful storage, you’ll want a container big enough so you can layer the tubers in without them touching each other. I begin with a layer of moist coir approximately 3cm thick and position my first layer of tubers being careful to ensure a good amount of room around them so that they are not going to shift and touch each other. This is very important. By isolating each tuber you are minimizing the risk of contamination. A rotting tuber which contacts another with expedite the rotting process in the next.

After the first layer I cover it with a thick layer of coir, approximately another 3cm to avoid vertical contact between the layers. This process is repeated until all the seed tubers are bedded into and covered with coir. The whole bucket then sits in the ambient storage until planting begins again in spring.

asparagus

Putting the asparagus beds to bed

Kilo for kilo Asparagus consistently rates as one of top performers of the farm. When it’s in season it sells out. That is, by definition, product demand. As someone who spent countless hours over the past year, propagating, planting, weeding, hoeing and harvesting it fills me with pride and pleasure when folks are excited by and buying our veg. Feeling this way, is enough motivation for me personally to grow it.

In our modern society where a trip to the supermarket can supply you with nearly anything at anytime of the year, Asparagus being one of the few hold outs makes it special.  In the south of england, Asparagus season falls in between May and June, an incredibly small harvest season by any standard. Add to this that an Asparagus bed takes four years tending before a first cropping can be expected and it isn’t difficult to see why it is likely to stay a seasonal veg.

After the last harvest in June the plant is allowed to grow to its full potential, the delicate spears transform into beautiful branches and in the late summer and early fall it’s tiny spherical fruits ripen to a deep shade of garnet as the stocks die back transforming to a brittle stand of golden beige. It’s a this stage in the first weeks of December that we put the Asparagus beds “to bed.”

Before the dry stocks are cut back, we weed the bed a final time. Keeping the dry stocks in situ while doing this allows us to easily estimate where on the bed it is safe to dig. The next years growth of asparagus spears are dependent on their crowns sitting just below the surface of the soil and digging weeds too close to them can inadvertently cause damage.


blue ballet squash seeds

Growing diversity: Spaghetti squash seed saving

You could argue that relative to the return, buying seeds yearly is a small and justifiable expense. Pouring over the seed catalogues can be incredibly exciting with its’ inspiring descriptions and beautiful photography designed to tempt even the most intrepid gardener into trying new or rare cultivars.

Myself, I fall firmly into the category of growers who plan and purchase seed annually. Only a few years ago did i begin saving seed of my own and like many I began with my Tomato seeds. This autumn, with my mind focusing on narrowing the impending “hunger gap” we will undoubtedly face in the colder climes of Norway I’ve been paying close attention to the various cultivars of squash gracing the Market Stall. Hand on heart, I’ve yet to eat a squash I didn’t like.  Some I definitely like better than others and there are many I’ve only recently come across.

I’ve begun saving seeds from the ones that have gotten thumbs up from both of us. I know that this is slightly risky. Unlike saving tomato seeds which self pollinate and can be counted on to reliably reproduce true to type, squash are able to pollinate each other and if grown in close proximity to another type can cross pollinate. The result would still look like the parent however the seed would then not produce true to type the following year.

Professional seed sellers take great precautions to ensure their specimen plants are pollinated only from the correct male flowers often binding a female flower just before it opens opening it to hand pollinate and then rebinding it to ensure the only pollen present is that which they have introduced. It’s not complicated, it’s something I plan to do next season. But in the spirit of adventure, this year I have harvested seeds from those squash I have eaten and enjoyed. There’s a good chance I’ll be able to raise a successful squash crop from them, but no guarantee the vegetables I get will resemble their parents.

I’ve taken a calculated risk. I’ve done this for some specific reasons. Firstly, I would rather begin learning the successful techniques for cleaning and storing seed before i have to do so with the true type seed of the lovely and rare heritage Themla Saunders Sweet Potato squash I’ve purchased for next year. It took me two years to be able to purchase these 7 seeds as they sell out incredibly early, I want to do everything I can to ensure I don’t have to purchase them again!

clean squash seeds

Spaghetti squash seeds. Left is dried 10 days, with membrane still attached, right is with membrane removed and ready for storage and future propagation

Secondly, I happened upon a Spaghetti Squash grown here in the UK. It’s not popular here, but it’s one of my favourites from when I lived in Canada. Delighted and excited to find it, I’ve waxed lyrical and at great lengths to many people and intend to gift seed to everyone I can. As far as I am concerned It took a brave farmer to plan this little known and lovely squash and people need to know about it to develop the market for it. Knowing that allotment people tend to be adventurous and willing to share their bounty, I feel sharing the seeds may help develop a market.

Sharing the seeds out also lets me do some vaguely scientific research. My theory is since none of the people I have allocated seeds to are experienced in growing Spaghetti Squash but each has experience growing successfully in the past hearing of their successes will allow me to gauge if my seed saving techniques are correct. Like I said, “vaguely scientific”!

My method for cleaning seeds came from the packaging of my purchased Thema Saunders. It stated to remove the seeds, clean and allow to dry separated from each other on a flat surface. Further investigation on line suggested to remove the membrane which closely skins the individual seeds. My first attempts to do this was with the newly liberated seeds, it was slippery and difficult. In my second attempt to remove the membrane I waited until ten days of drying. This was also time consuming but much less slippery and therefore, assuming successful propagation will be how i continue to remove the membranes in future.


garlic all year

Garlic all year round

In all my years I have only met one person who did not like garlic, and she would not even let it in her house, most of us use it in at least small quantities in our cooking. I really do believe that every garden, whether its potted, window or a grand allotment should grow at least some of it’s own. Garlic is easy to grow, tastes great and has a multitude of beneficial properties both for us and for our soil.

Modern scientific research has concluded that regular consumption of garlic has a lowering affect on the levels of  LDL cholesterol, lowers blood pressure and even shortens the duration of colds or flu. Many organic farmers believe that adding the dried leaves of harvested garlic back into the compost further extends the antioxidant benefits to the soils. I don’t know that there is any research proving this, but since benefits aren’t exclusive to simply the bulb, it does make sense to me.

This year was my first commercial harvest of garlic. I was lucky enough to be involved in each step, harvest “seed stock” selection, drying, preparation for market sale, grading seed and planting for 2016. Garlic may be one of the easiest in this regard, but I still learned quite a lot.

Organic Lea’s garlic aim is to have a supply year round, which is possible first by grading the seed stock and then though successional plantings. The largest, blemish and disease free bulbs are first chosen at drying. Once they’ve air dried and the papery outers have formed grading begins.

Grading is the process of breaking the bulb into it’s separate cloves and ordering them by size. The biggest outer cloves (bottom of the photo) are planted out in November here, usually around the fifth of November and over winter in the ground.  These will actually begin growing now owing to the moderate climate in the south east of England. These cloves will stay in the field growing the whole next season and be harvested as the dry garlic and seed stock for the following year. By choosing the biggest bulbs for this planting and doing this year on year you are effectively ensuring the best and strongest genes go forward, which over time will increase the overall size of your garlic bulb harvest.

The second category of grading is for the smaller cloves (middle of the photo) these bulbs are planted in spring and will be pulled early for the sale of “wet” garlic in the mid summer months.

Finally the slender inner cloves (top of the photo) are graded. These are sown in December however unlike the smaller bulbs these will be multi-sowen in the field, or under glass meaning each hole will receive more than one clove. We did this the first week of December in the glass house and planted four bulbs per hole. They’re buried at one clove depth. By sewing multiple cloves in this way we are planting to harvest the greens for fresh use as fresh herbs for salad and soups which will be harvested earliest of all, in the early summer.

By using each of the cloves and selecting them for what suits them best the farm (or your garden) can be producing garlic for year round use. Organic lea is lucky enough to have Thermidrome Garlic as it’s seed stock, originally from France it is a variety that does exceptionally well in heavy clay soils.

DSC_0361

Four season farming

Having come from a land of freezing cold, icy and snowy weather I am a late comer to the concept of year round farm production. Here in the milder climate of the South East of England, it is possible with some planning to have fresh produce on the table nearly the entire year long. This concept, and it’s actualization has been one of the biggest areas of learning in my training.

At Organic Lea, the place where I learn my practical farming skills, the more experienced and paid “Growers” who impart their knowledge to us plan and continually experiment with ways to work with nature to achieve year round seasonal fresh produce. Since early September the winter crops have been growing, in October they were hardening off and November, in the short gaps of good weather we began planting in the field. Beans, kales, peas, and garlic are now in the ground to ensure come the first warm days they are set to rocket skyward for early maturation.

Whilst our farm benefits from a massive greenhouse structure, meaning we are still harvesting some of the summers tomato crops, the humble allotment grower can easily mimic more of this than one might first imagine. Cloches, cold frames and even simple fleeces offer enough protection from the mild winters we experience so long as one gets the timing right! In the year two Organic Farming Training course the classes read two very good books that help with their studies, one of which is the masterpiece, Joy Larkcom’s “Grow Your Own Vegetables” a book I would strongly recommend to anyone who is interested in getting the most out of their garden in a sustainable way.


honey press

Pressing honey

I was very luck last week. I got to take part in the pressing of two boxes of honey from the apiary. Sean Hearn, is the man in charge of all things “bee” at Organic Lea. Through him, I’ve had my first introduction to the style of bee husbandry called “natural bee keeping” which I first wrote about here.

Natural bee keeping is much different than the more commonly practiced or industrial bee keeping, and the more I research different aspects, the more I find myself feeling that the natural method is more to my liking.

Following on from these differences, it should not be a surprise to learn that the process of honey extraction is another area where Sean steers away from the common industrial methods. I remember seeing a program about an off grid couple in the Blueridge mountains in the Appalachian mountain range who had top bar hives. Unfortunately the program was quite light in detail, but the woman did mention “pressing” the comb was the only way they had to release the honey.

I am not a cheap person when it comes to tools, nor am i frivolous. I believe that buying the best tools once is the best investment. When it came to a “honey extractor” I just didn’t like the notion of having a piece of equipment sit around for most of the year because it had only one use. When Sean said I could join the team for pressing, I was very excited but I had no idea how much that afternoon would teach me.

Foremost, wanted to know why Sean felt pressing was a better method than using a centrifuge extractor. I expected it was going to be a similar reason to my own conclusion, that a tool with one use that was used so infrequently wasn’t a good investment but to my surprise this turned out to be quite low on his list.

You see when bees gather nectar, that nectar includes  vitamins and minerals from the plant, the bee process it adding important enzymes and probiotics all in tiny trace amounts. When a bee fills a comb with her honey it is then capped off from the air and it all stays sealed inside.

Harvesting honey requires “uncapping” of the cells. In industrial operations, the uncapped honey gets inserted into a centrifuge which spins with such force air forces the honey out to the sides of the barrel where it drips down into a bucket. The process relies on air. Unfortunately, exposure to air releases some of the enzymes and probiotics. Thus the honey loses a significant amount of it’s original ingredients.

Cold pressing honey relies on pressure to force the honey out of the comb and while it still has contact with some air in the process of reaching the bucket below, this is reduced. Less of those important enzymes and probiotics are lost. Sean, and many other natural bee keepers believe that by retaining as much of these ingredients the honey is closer to it’s natural state and thus nutritionally superior.

I am a honey lover, but that day in the kitchen I tasted something far richer and more complex than even that which I have bought in local markets. It makes me wonder if that might have been the first real honey I have ever tasted?

Perhaps you have heard that honey was at one time considered a healing substance or even a cleanser? I have and I’ve often wondered. It seems logical that honey in it’s purest form was the start of these assertions. Perhaps modern technology, although faster has led us to harvests that may be high in efficiency but falling short on quality.

DSC_0779

Community projects

For the past 9 months I have been a regular volunteer and a trainee at an organic farm in Chingford called Organic Lea. I love them. They offer a space to learn skills and meet people as well as running a box scheme feeds over 300 local families. Over my time with them, one of the things I find most inspiring  is their constant drive to evolve the site.

Since 2001 they’ve had the land and the transformation has been incredible. You can read about this in detail on their website. One of the projects has been a community wine making  and in true community fashion throughout September on Fridays they are accepting grapes from local gardens for processing into wine. For those not interested in wine, the farm also has a community juicing day where people are encouraged to bring their apples and pears along with bottles and help process juices.

How many folks have grape vines or fruit trees even but don’t actually use  the produce? Many. It might be that they inherited a garden or they don’t have the skills to make good wine, aren’t sure about how to use pears or apples or perhaps they don’t have the time. What ever the reason, this project is a complete win:win scenario.