Tag Archives: organic gardening

IMG_8973

Closed loop systems and why they’re important

In the last post I mentioned the term “closed loop” in referring to how I would like our farm to run. A closed loop system is one that is self sustaining, ie nothing needs to be brought in from the outside in order for it to continue. This self perpetuation is the same principle people often refer to as “self sufficiency” and you can find versions of it in use in places that practice permaculture, in forest gardening and many organic farms.

Nature itself is a closed loop. She needs nothing from us to go on being self sufficient. Unfortunately, we humans usually need and want elements in addition to what is naturally occurring.  To meet our own needs initial investment or installation of outside elements is necessary.  For us, that means vegetable beds, chickens, turkey, bees and eventually a micro flock of sheep.  Although the addition of a these elements may not sound so large a change, they are. Fortunately by doing each step slowly and in turn and with some forethought it is possible to make each addition into a closed loop so that after the initial investment the cost is one of labor.

Even the addition of vegetable beds impacts the land. Everything we grow does so by withdrawing of nutrients from the soil. It is not enough to simply decide to grow your own food. While doing so is good, it’s not self sufficiency. To be self sufficient you must at the very least consider and replenish those lost nutrients. Best practice in this would be to aim to input more nutrient and organic matter into your growing beds than you take out. Doing so would increase on the soil life incrementally each year so that ultimately the land is healthier year on year. Makes sense, right? I think so.

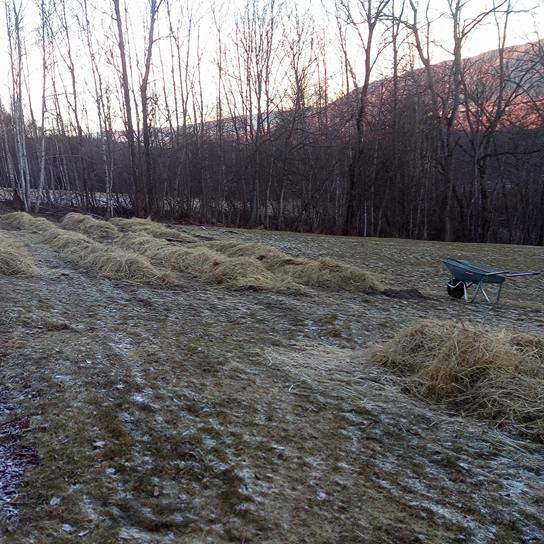
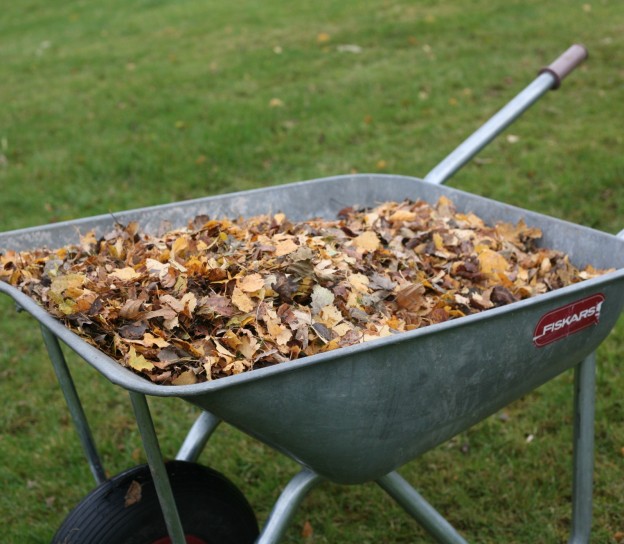
In our case we began the replenishing cycle this autumn before the veg beds had even been dug or the first seeds even planted. In fact, my very first project here when I arrived in October was the construction of a pair of compost bins and a leaf litter pile. Composting on site is an easy first step to creating a closed loop for vegetable production. Leaf litter piles, which eventually rot down to what is refereed to as “leaf mold” is an excellent addition to soil for the retention of moisture. Our land is sandy loam, with a higher percentage of sand than loam,  so anything we can do to promote retention of water for our growing veg is worthwhile.

One of the helpers I will be introducing into the farm life cycle will be the perennial Bocking 14 Comfrey a well known plant famed for it’s fertilizing properties in the organic world. Comfrey is such an important player in the plans for our farm that I’m going to write an in depth piece on it this year, but I digress.

Creating a closed loop for the vegetable production is essentially as simple as ensuring all of our vegetative growth from grass clippings and twigs to weeds and eventually  the plants themselves gets recycled via compost. In the spirit of returning back more to the soil than what we have taken out, we will be adding Comfrey leaves, nettles and leaf moud.  Overtime this cycle increases the fertility of our land, which increases it’s productivity allowing not only us to thrive but for the farm itself to do so as an ecosystem. Happily the closed loop system can be implemented with our livestock and to most every aspect  of our food system on the farm.

Kitchen Garden covered for winter's arrival.

A new year and a new chapter

The snow is blanketing the slopes and the clouds in the valley are hanging at what seems to be just above head height from my chair. I’ve made my first stock of the year from vegetable peelings and chicken bones, and I’m planning that by the end of the year this simple healthy base food will be all part of a closed loop system here on the farm.

Our goals for this year include raising chickens for meat and eggs, keeping turkeys, growing 50% of our own vegetables and establishing a herb bed. These may seem like the goals of an underachiever to some, I’ll freely admit that my natural inclination is to declare my intent to do “everything” but to make things easier for my other-half I’ve promised to understate my ambitions everywhere including here. It’s not natural for me, but hey, it can’t hurt!

In order to facilitate our plans for 2017 we have been doing some solid ground work. He has been building me a glasshouse from scratch. It’s a time consuming process. Getting the “free” windows was the easy bit. Since then, he’s scraped them all, re-puttied the seals, cut and hauled trees from our wood, milled wood to spec, built walls in sections, oiled, primed them and begun the gables. This week he hauled the second load of logs to our mill, it took 3 straight days. They are very big logs and among other projects they will also be the main frame for the glasshouse. At just under 50 square meters the glasshouse is going to be bigger than our cabin. He’s put in a lot of work to help ensure our growing has every advantage possible.

To compliment the glasshouse I’ve dug and mulched 10 out door beds, which will be our “kitchen garden” at 10m x 1.25m they give us approximately 125 square meters of growing space for the semi-hardy and hardy vegetables that will make up the bulk of our diet. I’ll tell you what, after three months of eating shop bought and mostly non-organic vegetables I am really excited to get back to eating food we know the sources of. Come on Spring!

Our cat who also made the journey to our new home in Norway. He's settling in now and likes to ensure he knows what's going on. Here, he is "owning" the logs that are going to be milled this spring.

Our cat who also made the journey to our new home in Norway. He’s settling in now and likes to ensure he knows what’s going on. Here, he is “owning” the logs that are going to be milled this spring.


DSC_0011

Salad, it ain’t what it used to be!

This year I planted specifically with a view to have fresh green salad to hand. It might sound like the move of someone who isn’t quite sure about gardening, but for me, it was a first.  I love the  modern version of salad that I have come to learn in the past two years but still harbor strong unpleasant feelings toward its 80s incarnations. Planting salad for the 2016 season was in a way an effort to purge the negative feelings toward something that may just become an important aspect of my future.

It wasn’t until my twenties  that I started to voluntarily eat salad. “Rocket” had just become the new fashionable thing in Toronto usually accompanied by avocado, tomato and either mozzarella or feta. Until then, my only engagement with salad was the lackluster iceberg, cucumber tomato trilogy my mother put on the table whenever she was on a new diet.

It’s not her fault, a whole generation made salad this way. Back then, if anyone had told me I was purposely going to plant myself a salad garden, I would have scoffed.

It’s the first week of summer and I have harvested my first proper salad meal. Over the past two years I have really had my eyes and my taste buds opened to the magic that can be in a bowl of greens. I am grateful. Early in my journey when Ru Litherland first suggested that our smallholding consider salad as a cash crop I had serious prejudice. My mind still holds the bland and boring salads of my youth as it’s go to image of what a salad “is”. But today, when i sat down to eat my lunch and the beauty of what was on my plate began to sink in I gave the idea it’s first serious consideration.  Salad, as a revenue stream has a lot of positive things going for it. It grows quickly, can be done early in a glass house and later in the field, luxurious versions can a relatively profitable. It’s also something I have a lot of harvesting experience with, which is another key consideration.

The banal bowl of my childhood has been replaced by a colorful, fragrant, multi flavored, visually enticing ever changing and exciting mix of herbs, leaves, and flowers. For me there is something decidedly decadent about eating flowers. For starters, it wasn’t something I knew you could do until I started my apprenticeship, and I am not alone. I have to admit, not all of them taste of much, regardless, the fact that they’re there in all their esthetic splendor adds to the enjoyment of eating.

Recently, I’ve been contemplating how the land will generate the capital we will need going forward. Luckily we don’t need much. Salad, might just be the trick.. or one of them.

Today’s salad: Beet leaf, Nasturtium leaf, CCA lettuce, garlic chive flowers, Viola Tri-color and foraged Elderflower.


lifting rhubarb

Readying rhubarb for the coming spring

Here in the United Kingdom Rhubarb enjoys a rather prestigious place in the culinary calendar. The pale pink slender stems of “Champagne Rhubarb” are both the ushers of spring and the first reliable cash crop of the year. No matter how much is grown at Organic Lea, the demand far outstrips the supply our mere 2 acres of diverse intensive farming can produce.

Champagne Rhubarb production is lucrative, but it can also be relatively expensive as the crop is grown in heated forcing sheds. Currently, nine square miles of West Yorkshire, is known as “The Rhubarb Triangle” and encompasses twelve farms. In 2010 these farmers approached the European Commission’s Protected Food Name scheme and were awarded Protected Designation of Origin status (PDO) for the term, “Yorkshire forced rhubarb.” Forcing Rhubarb is big business for some, however it can be done with some success in a low tech way small scale using your netting wires and a blackout cloth.

For many growers,  Rhubarb is planted once. It’s widely accepted that some vegetables like Rhubarb, Asparagus and Jerusalem Artichoke, stay put when planted and remain indefinitely. Many successful allotments and growers subscribe to this thinking and harvest successfully year on year. Organic Lea is committed to using two of it’s acres to intensive organic farming and rotation is a key element in keeping both plants and soil healthy. This means that even crops that traditionally stay “forever” in one place are included in rotation, albeit for these crops they move once every four years.

This is year four for our early Rhubarb crop and the first year of it’s rotation, so this week we uprooted one of the four rows of Timperley Early and began the process of splitting and moving it to the area of the farm called The West Bank, or Salad Terrace. Over the years, the team have noticed that the Salad Terrace is the coldest plot on the farm. It is also the most over run with Horsetail. The thinking is, that Timperly Early will not suffer from the slightly colder micro climate and that with it’s maturity it’s wide leaves may also slow the rampant encroachment of one of the world’s oldest known “weeds.” Both of these factors have inhibited the Asparagus from reaching it’s full potential so we are effectively preforming an experimental swap of the two.

Splitting the Rhubarb serves two purposes, the first and most obvious is propagation. Mature crowns are quite easily split to produce multiple plants. To do this effectively one only need ensure each split contains both root and bud, we leave two to three buds in a spit.

The second reason for splitting is to cut away the heart. This may seem counter-intuitive, however the older a plant is, the more susceptible it becomes to disease. By lifting and splitting the crowns and cutting out the old growth we are taking preventative measures against potential disease in the crop. The oldest part, or heart then is added to our compost completing its circle.

DSC_1096 (2)

Growing Diversity: saving Jerusalem Artichoke seed

Before the ground freezes, and after the stocks have turned crunchy and golden is the time lift and store our Jerusalem Artichoke tubers. These starchy little wonders will liven up your meals through the dark days of January and February as well as add an element of beauty during the growing season, but you already know that if your now reading about how to save the tubers for next season!

Similar to what we look for when harvesting Garlic for seed, you are again looking to save and replant prime specimens. Those that we plant should be those with the positive traits we want to encourage in order to improve our seed stock and harvest year on year.

With Jerusalem Artichoke, this means setting aside those golfball size tubers, that are knob and blemish free. The should not show any sign of blight, insect damage or disease. One you’ve set aside your seed stock you’ll need to store it before it’s time to go in the ground again. Always try and store a small percentage more than you think you are likely to need as with planting there will always be the chance of failure in a few.

For the best chance of a successful storage, you’ll want a container big enough so you can layer the tubers in without them touching each other. I begin with a layer of moist coir approximately 3cm thick and position my first layer of tubers being careful to ensure a good amount of room around them so that they are not going to shift and touch each other. This is very important. By isolating each tuber you are minimizing the risk of contamination. A rotting tuber which contacts another with expedite the rotting process in the next.

After the first layer I cover it with a thick layer of coir, approximately another 3cm to avoid vertical contact between the layers. This process is repeated until all the seed tubers are bedded into and covered with coir. The whole bucket then sits in the ambient storage until planting begins again in spring.

asparagus

Putting the asparagus beds to bed

Kilo for kilo Asparagus consistently rates as one of top performers of the farm. When it’s in season it sells out. That is, by definition, product demand. As someone who spent countless hours over the past year, propagating, planting, weeding, hoeing and harvesting it fills me with pride and pleasure when folks are excited by and buying our veg. Feeling this way, is enough motivation for me personally to grow it.

In our modern society where a trip to the supermarket can supply you with nearly anything at anytime of the year, Asparagus being one of the few hold outs makes it special.  In the south of england, Asparagus season falls in between May and June, an incredibly small harvest season by any standard. Add to this that an Asparagus bed takes four years tending before a first cropping can be expected and it isn’t difficult to see why it is likely to stay a seasonal veg.

After the last harvest in June the plant is allowed to grow to its full potential, the delicate spears transform into beautiful branches and in the late summer and early fall it’s tiny spherical fruits ripen to a deep shade of garnet as the stocks die back transforming to a brittle stand of golden beige. It’s a this stage in the first weeks of December that we put the Asparagus beds “to bed.”

Before the dry stocks are cut back, we weed the bed a final time. Keeping the dry stocks in situ while doing this allows us to easily estimate where on the bed it is safe to dig. The next years growth of asparagus spears are dependent on their crowns sitting just below the surface of the soil and digging weeds too close to them can inadvertently cause damage.


blue ballet squash seeds

Growing diversity: Spaghetti squash seed saving

You could argue that relative to the return, buying seeds yearly is a small and justifiable expense. Pouring over the seed catalogues can be incredibly exciting with its’ inspiring descriptions and beautiful photography designed to tempt even the most intrepid gardener into trying new or rare cultivars.

Myself, I fall firmly into the category of growers who plan and purchase seed annually. Only a few years ago did i begin saving seed of my own and like many I began with my Tomato seeds. This autumn, with my mind focusing on narrowing the impending “hunger gap” we will undoubtedly face in the colder climes of Norway I’ve been paying close attention to the various cultivars of squash gracing the Market Stall. Hand on heart, I’ve yet to eat a squash I didn’t like.  Some I definitely like better than others and there are many I’ve only recently come across.

I’ve begun saving seeds from the ones that have gotten thumbs up from both of us. I know that this is slightly risky. Unlike saving tomato seeds which self pollinate and can be counted on to reliably reproduce true to type, squash are able to pollinate each other and if grown in close proximity to another type can cross pollinate. The result would still look like the parent however the seed would then not produce true to type the following year.

Professional seed sellers take great precautions to ensure their specimen plants are pollinated only from the correct male flowers often binding a female flower just before it opens opening it to hand pollinate and then rebinding it to ensure the only pollen present is that which they have introduced. It’s not complicated, it’s something I plan to do next season. But in the spirit of adventure, this year I have harvested seeds from those squash I have eaten and enjoyed. There’s a good chance I’ll be able to raise a successful squash crop from them, but no guarantee the vegetables I get will resemble their parents.

I’ve taken a calculated risk. I’ve done this for some specific reasons. Firstly, I would rather begin learning the successful techniques for cleaning and storing seed before i have to do so with the true type seed of the lovely and rare heritage Themla Saunders Sweet Potato squash I’ve purchased for next year. It took me two years to be able to purchase these 7 seeds as they sell out incredibly early, I want to do everything I can to ensure I don’t have to purchase them again!

clean squash seeds

Spaghetti squash seeds. Left is dried 10 days, with membrane still attached, right is with membrane removed and ready for storage and future propagation

Secondly, I happened upon a Spaghetti Squash grown here in the UK. It’s not popular here, but it’s one of my favourites from when I lived in Canada. Delighted and excited to find it, I’ve waxed lyrical and at great lengths to many people and intend to gift seed to everyone I can. As far as I am concerned It took a brave farmer to plan this little known and lovely squash and people need to know about it to develop the market for it. Knowing that allotment people tend to be adventurous and willing to share their bounty, I feel sharing the seeds may help develop a market.

Sharing the seeds out also lets me do some vaguely scientific research. My theory is since none of the people I have allocated seeds to are experienced in growing Spaghetti Squash but each has experience growing successfully in the past hearing of their successes will allow me to gauge if my seed saving techniques are correct. Like I said, “vaguely scientific”!

My method for cleaning seeds came from the packaging of my purchased Thema Saunders. It stated to remove the seeds, clean and allow to dry separated from each other on a flat surface. Further investigation on line suggested to remove the membrane which closely skins the individual seeds. My first attempts to do this was with the newly liberated seeds, it was slippery and difficult. In my second attempt to remove the membrane I waited until ten days of drying. This was also time consuming but much less slippery and therefore, assuming successful propagation will be how i continue to remove the membranes in future.


garlic all year

Garlic all year round

In all my years I have only met one person who did not like garlic, and she would not even let it in her house, most of us use it in at least small quantities in our cooking. I really do believe that every garden, whether its potted, window or a grand allotment should grow at least some of it’s own. Garlic is easy to grow, tastes great and has a multitude of beneficial properties both for us and for our soil.

Modern scientific research has concluded that regular consumption of garlic has a lowering affect on the levels of  LDL cholesterol, lowers blood pressure and even shortens the duration of colds or flu. Many organic farmers believe that adding the dried leaves of harvested garlic back into the compost further extends the antioxidant benefits to the soils. I don’t know that there is any research proving this, but since benefits aren’t exclusive to simply the bulb, it does make sense to me.

This year was my first commercial harvest of garlic. I was lucky enough to be involved in each step, harvest “seed stock” selection, drying, preparation for market sale, grading seed and planting for 2016. Garlic may be one of the easiest in this regard, but I still learned quite a lot.

Organic Lea’s garlic aim is to have a supply year round, which is possible first by grading the seed stock and then though successional plantings. The largest, blemish and disease free bulbs are first chosen at drying. Once they’ve air dried and the papery outers have formed grading begins.

Grading is the process of breaking the bulb into it’s separate cloves and ordering them by size. The biggest outer cloves (bottom of the photo) are planted out in November here, usually around the fifth of November and over winter in the ground.  These will actually begin growing now owing to the moderate climate in the south east of England. These cloves will stay in the field growing the whole next season and be harvested as the dry garlic and seed stock for the following year. By choosing the biggest bulbs for this planting and doing this year on year you are effectively ensuring the best and strongest genes go forward, which over time will increase the overall size of your garlic bulb harvest.

The second category of grading is for the smaller cloves (middle of the photo) these bulbs are planted in spring and will be pulled early for the sale of “wet” garlic in the mid summer months.

Finally the slender inner cloves (top of the photo) are graded. These are sown in December however unlike the smaller bulbs these will be multi-sowen in the field, or under glass meaning each hole will receive more than one clove. We did this the first week of December in the glass house and planted four bulbs per hole. They’re buried at one clove depth. By sewing multiple cloves in this way we are planting to harvest the greens for fresh use as fresh herbs for salad and soups which will be harvested earliest of all, in the early summer.

By using each of the cloves and selecting them for what suits them best the farm (or your garden) can be producing garlic for year round use. Organic lea is lucky enough to have Thermidrome Garlic as it’s seed stock, originally from France it is a variety that does exceptionally well in heavy clay soils.

DSC_0361

Four season farming

Having come from a land of freezing cold, icy and snowy weather I am a late comer to the concept of year round farm production. Here in the milder climate of the South East of England, it is possible with some planning to have fresh produce on the table nearly the entire year long. This concept, and it’s actualization has been one of the biggest areas of learning in my training.

At Organic Lea, the place where I learn my practical farming skills, the more experienced and paid “Growers” who impart their knowledge to us plan and continually experiment with ways to work with nature to achieve year round seasonal fresh produce. Since early September the winter crops have been growing, in October they were hardening off and November, in the short gaps of good weather we began planting in the field. Beans, kales, peas, and garlic are now in the ground to ensure come the first warm days they are set to rocket skyward for early maturation.

Whilst our farm benefits from a massive greenhouse structure, meaning we are still harvesting some of the summers tomato crops, the humble allotment grower can easily mimic more of this than one might first imagine. Cloches, cold frames and even simple fleeces offer enough protection from the mild winters we experience so long as one gets the timing right! In the year two Organic Farming Training course the classes read two very good books that help with their studies, one of which is the masterpiece, Joy Larkcom’s “Grow Your Own Vegetables” a book I would strongly recommend to anyone who is interested in getting the most out of their garden in a sustainable way.


bees2

Swarming is important

I ‘ve done a lot of searches on the internet in preparation for my eventual acquisition of bees for our Norwegian smallholding. Like many folks I have seen the media reports on how our bees are dying and am worried. I know bees aren’t our only pollinators but I love honey, and of course I want our pollination rates to be as high as possible, so having a pair of hives on our land seems an obvious choice. The more I learn about bees the more interesting they become to me. It’s a topic I can see myself delving into over decades, one like sustainable farming, I will always be learning more about.

I’ve watched numerous documentaries from all over the world. Devoured information on Skep, main stream National and Topbar hives and read dozens of blogs. By and large, it seems most sources are of the opinion that a bee keeper must prevent swarming. In fact, a bee keeper who allows his bees to swarm is widely regarded as a “bad bee keeper.” Perhaps it is my lack of practical skills with bees or a fundamental misunderstanding on my part, but when I read about swarming, my first reaction was excitement. I just kept thinking, “A new colony, fantastic!” The negativity confused me.

I remained confused for quite some time and then I met Sean Hearn, who has one of his apiary set ups at the farm I train at. I was lucky enough to be able to assist Sean a few times over the last few months and while doing so he patiently answers my queries. He was also the first person to give me an answer about swarming that made sense to me.

Sean, although trained in traditional bee keeping, is one of a small number of bee keepers who subscribe to what is either called “sustainable or natural bee keeping” a school of thought where minimal interference is practiced, chemicals avoided and focus is on both the hive’s health as well as production of honey.

As under the gun to learn as much as possible as I feel I never seem to get as much time with the mentors on the farm as I would like or probably need and Sean is no exception, but I’ve found his blog quite good as an additional source of information.

Natural bee keeping is vastly different from industrial counterpart. To fully appreciate how radical it is you need to understand traditional or industrial methodology first. This podcast where Sean speaks to the folks at 21stCenturyPermaculture points out some of the main differences is quite good as a starting point. The subject is quite broad of course, but the cord that first resonated with me is the point of swarming.

Natural keepers accept swarming. The swarm is actually the hive reproducing itself and to prevent this, is to take away the ability to reproduce naturally. This is much akin to comparing an F1 plant to the open pollinators.

I know already which sort I believe to be important for our future.